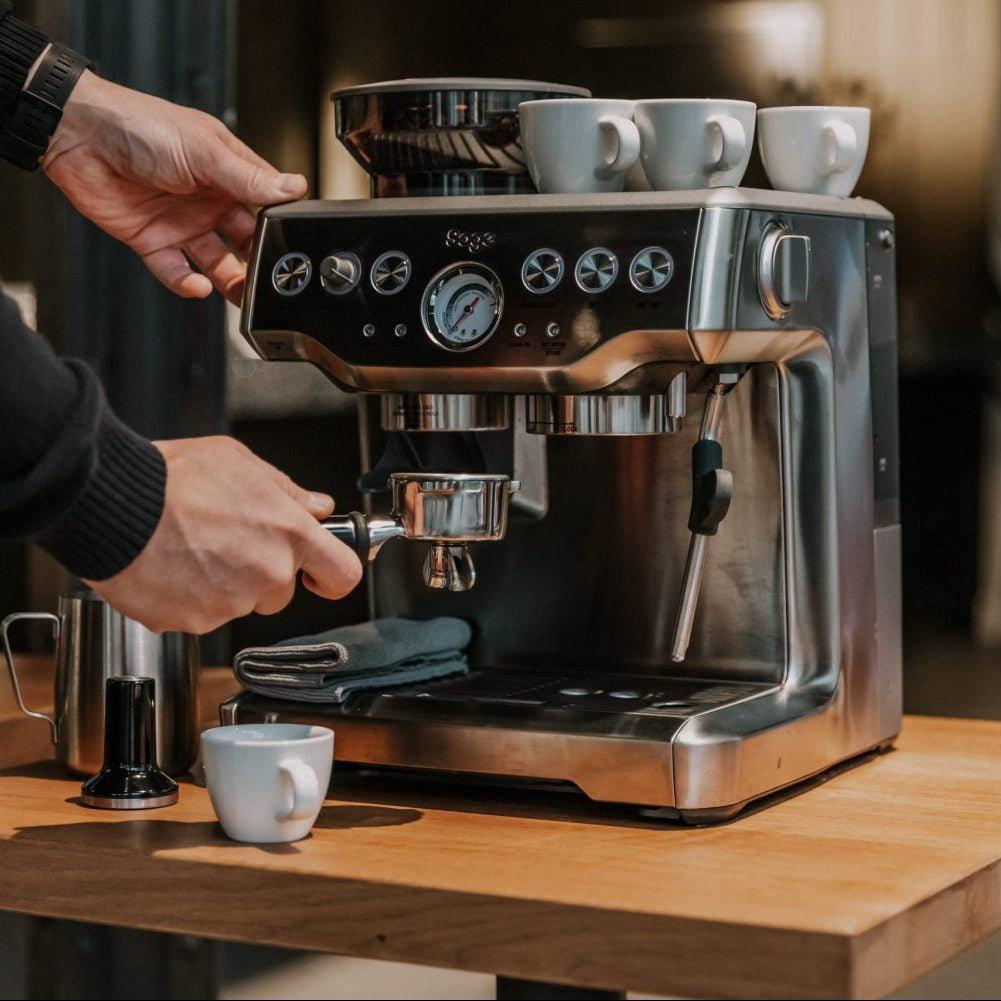
As a dedicated coffee enthusiast, I’ve discovered that achieving the perfect espresso goes far beyond just the right grind size or extraction time. One crucial factor that often gets overlooked is brew temperature. When I began using my Breville (or Sage, as it’s known in the UK) Barista Express, I was thrilled by the level of control I had over the brewing process. Adjusting the brew temperature opened up a new realm of flavor possibilities for my espresso.
If you’re looking to fine-tune the brew temperature on your Breville/Sage Barista Express, this guide will take you through the steps. Whether you’re optimizing for a specific roast or making adjustments for altitude, mastering this control will elevate your espresso experience, much like the features found in the Breville Dual Boiler BES920XL Review and the Breville Barista Touch Impress Review.

Why Brew Temperature is Key
Before jumping into the adjustments, let’s look at why brew temperature is so important.
The brew temperature significantly impacts how flavors are extracted from the coffee grounds. If it’s too high, you risk over-extracting, resulting in bitter or burnt flavors. Too low, and you’ll under-extract, producing a weak or sour espresso. Generally, an ideal temperature range for espresso is between 195°F and 205°F (90°C to 96°C), but this can vary based on the beans and roast level.
For example, I’ve found that lighter roasts come to life at slightly higher temperatures, showcasing their bright and intricate flavors. On the other hand, darker roasts benefit from lower temperatures, which help minimize bitterness and emphasize a fuller body.
Fortunately, the Barista Express allows precise adjustments to this vital variable. Here’s how to make those changes.
Getting to Know Your Breville/Sage Barista Express
The Breville/Sage Barista Express is well-regarded for blending ease of use with advanced settings. One of its key features is the internal PID controller, which maintains stable temperature throughout the brewing process. While the machine doesn’t have a dedicated temperature control button, it offers a hidden setting to adjust temperature directly.
Follow these steps to access and tweak the temperature.
Step-by-Step Guide: Adjusting Brew Temperature
1. Power Off the Machine
To begin, ensure that your Barista Express is powered off. Press the power button to turn it off completely, as the machine needs to be in standby mode for this process.
2. Enter Programming Mode
To access temperature settings, press and hold the ‘Program’ button while pressing the ‘Power’ button simultaneously. Keep holding the ‘Program’ button until the front panel lights flash, signaling that you’re in temperature adjustment mode.
3. Modify the Temperature
In programming mode, use the ‘Single Shot,’ ‘Double Shot,’ and ‘Filter Size’ buttons to adjust the brew temperature:
- Press the ‘Single Shot’ button to decrease the temperature by 2°F (1°C).
- Press the ‘Double Shot’ button to increase the temperature by 2°F (1°C).
- Press the ‘Filter Size’ button to reset to the default temperature of 200°F (93°C).
The LED lights on the front panel will indicate your selected temperature:
- Both ‘1 Cup’ and ‘2 Cup’ lights on: Default temperature at 200°F (93°C).
- ‘1 Cup’ light only: Temperature set to approximately 198°F (92°C).
- ‘2 Cup’ light only: Temperature increased to approximately 202°F (94°C).
4. Save Your Settings
Once you’ve chosen your temperature, press the ‘Program’ button again to save and exit programming mode. The machine will briefly turn off and then restart with your updated temperature settings.
5. Test Your Brew
With the new temperature setting, pull a test shot. Observe the taste and extraction time carefully. If the flavor isn’t to your liking, repeat the steps to fine-tune the temperature until you find the ideal balance.
Achieving the perfect flavor might take a few adjustments, but the improvement in your espresso will make it worthwhile.
Tips and Troubleshooting
Adjustments Aren’t Taking Effect:
Ensure you’re in programming mode by checking for flashing lights. If they’re not flashing, you won’t be able to change the temperature.
Flavor Still Isn’t Right:
If temperature adjustments alone don’t resolve flavor issues, consider fine-tuning other factors, such as grind size or tamping pressure. Brew temperature is just one piece of the espresso-making puzzle.
Adjusting for Different Beans:
Remember that various beans and roast levels respond differently to temperature changes. Light roasts generally shine at higher temperatures, while dark roasts often taste best at lower temperatures.
Conclusion
Mastering the brew temperature on your Breville/Sage Barista Express can dramatically improve your espresso experience. This small adjustment lets you bring out the unique flavors in different beans, enhancing each cup's richness and complexity.
After experimenting with temperature adjustments myself, I noticed a significant improvement in the depth and nuances of my espresso shots. If you’re still using the default settings, I encourage you to try adjusting the temperature—you may be pleasantly surprised by how this simple tweak transforms your morning espresso! For those who are also comparing models like the Breville Barista Express Impress vs Pro, Breville Barista Pro vs Express, or the Breville Oracle vs Oracle Touch, this adjustment can be a game changer for unlocking the full potential of your machine’s performance.